How to Install Oracle VirtualBox on Windows
If you're looking to install Oracle VirtualBox on Windows, this guide will walk you through every step. VirtualBox is a powerful, free virtualization tool that allows you to run multiple operating systems on your Windows machine. Follow this comprehensive guide to learn how to install Oracle VirtualBox on Windows 10, Windows 11, or earlier versions and create a virtual machine for your needs.
Download Oracle VirtualBox
To begin the process of installing Oracle VirtualBox on Windows, you'll first need to download the software. Here's how:
- Go to the official Oracle VirtualBox website: https://www.virtualbox.org.
- Navigate to the "Downloads" section from the top menu.
- Select the Windows hosts option under "VirtualBox platform packages" to download the installer compatible with your Windows version.
Once downloaded, double-click the installer to launch the setup wizard.

Install Oracle VirtualBox on Windows
After downloading the installer, follow these steps to install Oracle VirtualBox on your Windows system:
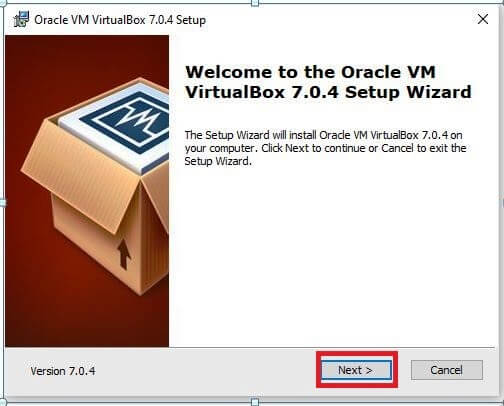
Click Next on the welcome screen to begin the installation process.
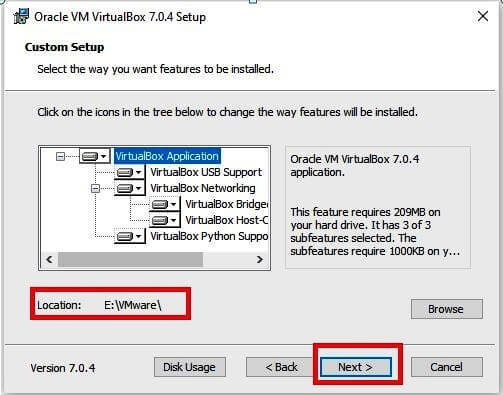
Choose the installation location or use the default path. Click Next to proceed.
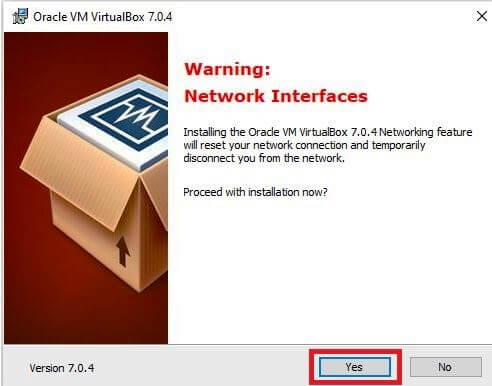
Review the warning about network interfaces and click Next to continue.
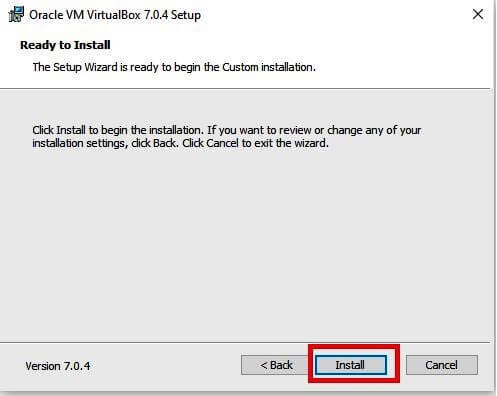
Click Install to start the installation process. Windows may prompt you to confirm changes; click Yes.
Once the installation is complete, lick Finish to exit the setup.
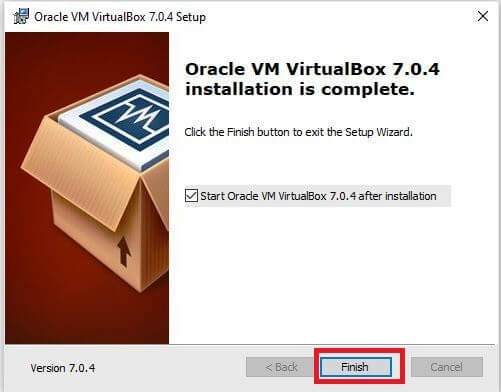
Launch Oracle VirtualBox and Create a Virtual Machine
Now that you’ve successfully installed Oracle VirtualBox on Windows, it’s time to create your first virtual machine:
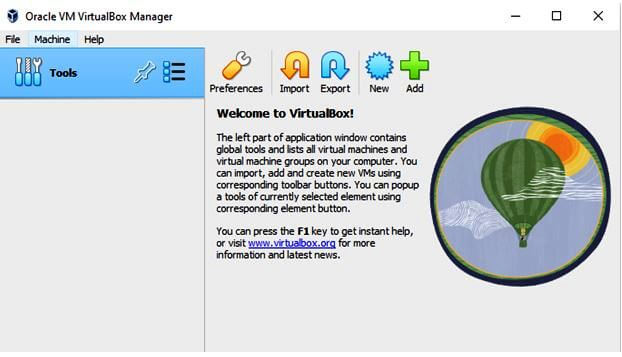
Open Oracle VirtualBox from the desktop or start menu.
Click on Machine in the top menu and select New.
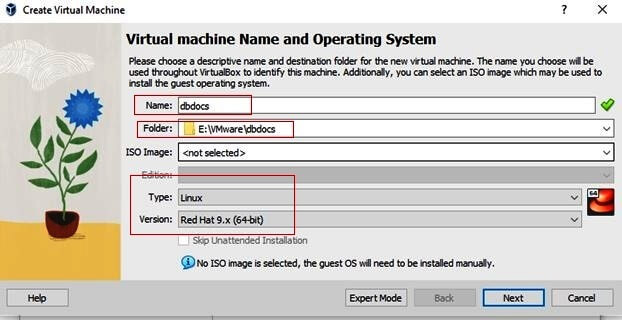
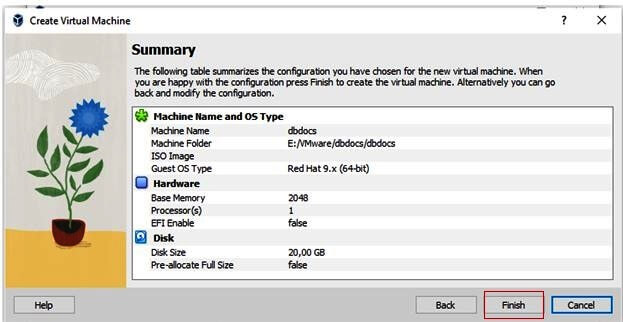
Enter a name for your virtual machine, choose the machine folder location, and select the type and version of the operating system you want to install.
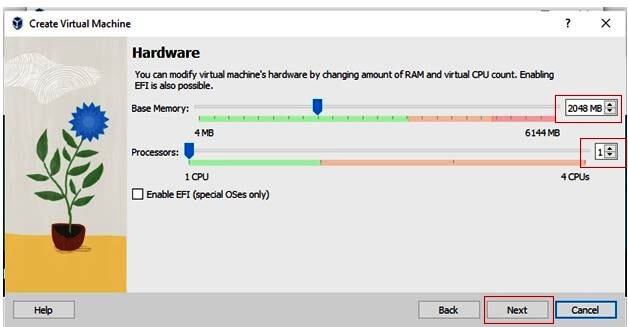
Set the memory size (RAM). For a Linux VM, 2048MB is recommended, while for a Windows VM, 4096MB or more is ideal.
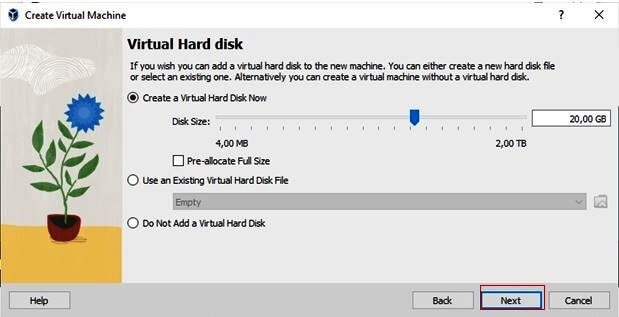
Create a new virtual hard disk or use an existing one, and configure the disk size and type as needed.
Click Finish to complete the virtual machine creation process.
Troubleshooting Common Installation Issues
If you encounter any issues while installing Oracle VirtualBox on Windows, consider the following troubleshooting tips:
- Installation Fails: Ensure that all Windows updates are installed and your system meets the minimum requirements for VirtualBox.
- Network Issues: Restart your computer after installation to resolve any network adapter issues.
- Performance Problems: Allocate more RAM or CPU cores to your virtual machine to improve performance.
Conclusion
Congratulations! You’ve successfully installed Oracle VirtualBox on Windows and created your first virtual machine. Whether you’re using it to test software, run different operating systems, or for educational purposes, VirtualBox provides a versatile platform for virtualization on Windows. Remember to explore advanced features like shared folders, snapshots, and network configurations to get the most out of your virtual machines.
If you found this guide on how to install Oracle VirtualBox on Windows helpful, be sure to share it with others. Stay tuned for more tutorials and tips on using VirtualBox and other virtualization tools!
Related Content